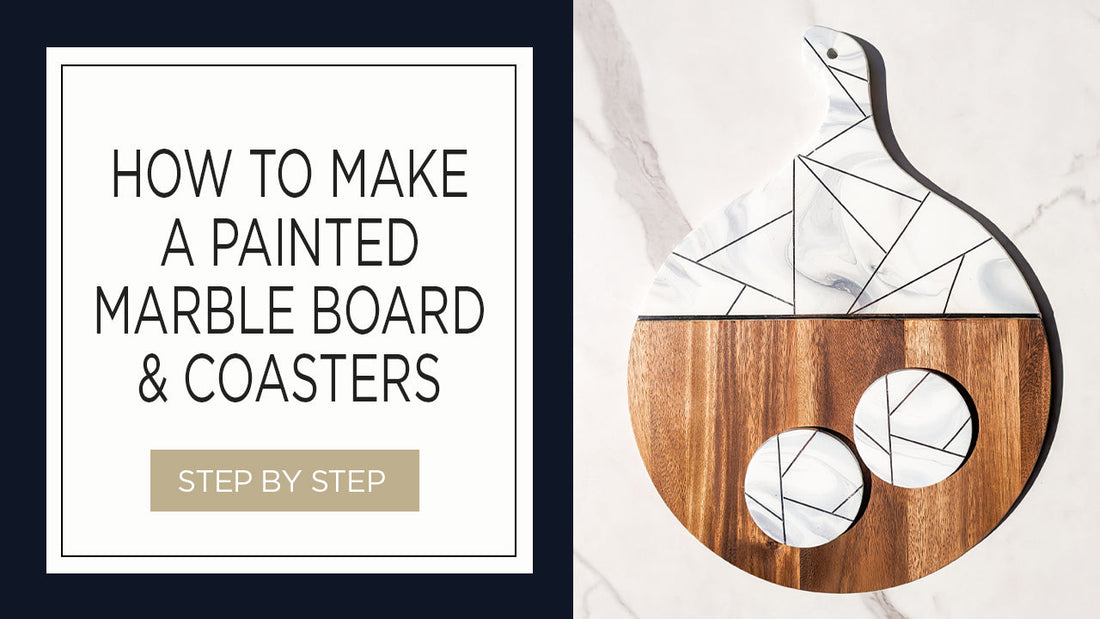
What better way to serve appetizers at your next party than with a beautiful, painted resin cheese board that you made yourself! Featuring an elegant marble design coated with glossy, food-safe resin, this charcuterie board and coaster set is fun to make and can be customized to match your home decor.

Columbus, OH based mixed media artist Sarah Hunyadi specializes in creating gorgeous, functional home decor items. In this tutorial, Sarah shares how to create a painted marble board with matching coasters. She demonstrates a variety of techniques, including acrylic marbling, fine line detailing, pouring a glossy resin topcoat, and making final touch-ups for the perfect finish.
There's a little bit of everything for everyone!
Watch the video tutorial here:
What You’ll Need:
To prepare the board and coasters:
- Acacia wood board with a handle
- Ceramic coaster rounds (select coasters that come with cork backings)
- Contact shelving paper
- Scissors & X-acto knife
- Painter's tape
- Brown kraft paper
To create the design:
- Acrylic paint in white and Payne's Gray
- Floetrol (or pouring medium of your choice)
- Water
- 2 Plastic mixing cups & craft sticks
- 2 paper cups, one for each color of paint
- Puppy pad to line your work surface
- Stands to set the board and coasters on
- Palette knife
- Mylar silver tape in 1/16" and 1/4" widths
- X-acto knife
For the resin topcoat:
- Plastic cling wrap
- Painter's tape
- ArtResin
- Silicone mat to line your work surface to cover your work surface
- Gloves, plastic mixing cup and plastic stir stick
- Maker's Studio Torch
- Dust cover
To touch up the board:
- Heat gun
- Soft cloth or towel
- Dremel with a grinding attachment
- Isopropyl alcohol & paper towel
- GooGone
- Sanding block
- Soft cloth rags
- Minwax pre-stain
- Minwax wood stain in a medium brown
- Food-grade cutting board oil
1. Prepare The Board & Coasters
Choose a high-quality cheese board with a substantial weight for the best results. For ceramic tiles, consider purchasing this set from Amazon. They are higher quality than those found at hardware stores and include a cork backing for a professional finish.


The first step is to prep the back of your wood. While you can use painter's tape or liquid latex, Sarah prefers contact shelf liner. It's efficient, sticky, available in large sheets, inexpensive, and easy to find at hardware stores. To apply, simply place the object down, trace it, and attach it to your board or coasters.

Lining up the contact paper with the edge of the board can be challenging, so take your time. Start by aligning the edge of the contact paper with the handle of the board and carefully work your way down. Smooth the paper from top to bottom with your hands, then use a scraper to burnish it, ensuring it adheres well and is free of air bubbles.


Use scissors to trim any excess contact paper. For curved edges, cutting out the hole in the handle, or to smooth out rought edges, an X-Acto knife works best.


Place a piece of painter's tape about 5” down from the top of the board. Burnish it well with a scraper tool, ensuring it adheres securely, especially on the curved edges.


As an added precaution, add a second layer of tape on the curves to prevent paint leaks.

Cover the lower half of the board with brown kraft paper, securing it with tape and folding any excess paper on the backside. Burnish all taped areas one last time to ensure a tight seal.


1. Prepare The Paint
The idea in this project is to replicate a marble look. Sarah uses a predominantly white base with a small amount of Payne's Grey for the veining. She suggests testing different paint brands, as Payne's Grey can sometimes appear more blue than grey.

To achieve a marbled look, the paint consistency is key. Sarah uses a 3:1 ratio of Floetrol to acrylic paint. In a plastic cup, add 1 part heavy bodied acrylic paint.


Next, shake the Floetrol bottle well and add 3 parts to the cup. The pouring medium promotes the formation of cells and ensures the paint dries evenly and smoothly without cracking.

Mix until smooth, ensuring there are no lumps. Add a little water if the consistency is too thick. Aim for a fluid, cream-like consistency: as the paint runs off the stir stick into the cup, you should see a slight mound that quickly disappears.

Repeat these steps to prepare a small amount of Payne's Grey. As long as you maintain the 3:1 ratio, you can mix up as much or as little as you need.


Ensure the grey and white paint are both the same consistency.

3. Pour The Paint
Place the board and coasters on support stands above your lined work surface.

Fill a small disposable paper cup, like a Dixie cup, about halfway with white paint.

Next, add a small amount of gray paint. You need much less gray paint than you might think, and it may take a few attempts to find the right amount.

Finally, cover the gray paint completely with another layer of white paint. Swirl gently to mix. Swirling the cup creates the marbling effect, so don't skip this step.
covering with white


Pour the paint onto the board in a swooping motion while turning the cup to create an organic marble effect. Tilt the board slowly to spread the paint, ensuring it flows over the edges and creates a marbled pattern.
💡 TIP: Subtle marbling is ideal if you plan to add geometric line work later. Too much marbling can be distracting. However, feel free to go for heavier marbling if you're not adding line work.


Repeat the process: layering the paint in the paper cup, pouring and tilting until the board is fully covered with the desired marbling effect.


Experiment with different techniques for varied effects: try using a palette knife to cover any bare spots, throwing the paint intentionally, or blowing on it to encourage the marbling to spread or round out.
💡 TIP: If you're not satisfied with the result or the paint color seems too dark, simply tilt the board to let the excess paint run off and start again.


Run a flame torch over the wet paint to pop any air bubbles.
Finally, cover with a clean plastic tote or a cardboard box and leave for 2-3 days to allow the paint to fully dry and cure.

4. Touch Ups & Linework
After the paint has dried, inspect the board carefully. If necessary, make touch-ups to areas with bare spots, exposed wood, or unwanted gray marbling. Allow the touch-up paint to dry for another week.

Next, remove the kraft paper to reveal the paint edges. Examine the board carefully, as paint can sometimes bleed under the tape into the wood grooves, particularly on the rounded edges. Use an X-acto knife to gently scrape away any paint bleed, ensuring not to scratch the wood finish.


5. Line work
Next, Sarah adds geometric line detailing with silver mylar tape. You can paint a design by hand if you prefer, but mylar tape is easy to use, provides a clean edge, and adds a metallic touch to the marbled pour paint design. Sarah uses 1/16" tape for the line work and 1/4" tape for the border.


Burnish the tape lines with your finger to ensure they adhere well. Do this carefully to avoid wrinkles. Pay particular attention to the sides, pushing the tape down onto the curves as much as possible.


Create a border along the paint edge with 1/4” mylar tape, burnishing it and trimming the edges as you did for the main line work design. Repeat a similar design on the coasters to tie them together.


6. Apply the ArtResin
Place a strip of painter's tape along the design edge, reinforcing curved areas with two layers to prevent resin from bleeding underneath. Burnish the tape with a spreader to firmly adhere it to the board.


Protect the remaining wood with saran wrap secured with tape.

Fold the tape's tail ends for easy removal 2-3 hours after pouring, so you don't have to touch the board. Fold the excess plastic wrap against the back of the board and secure it with tape.


While wearing gloves, prepare the ArtResin according to the label directions: equal parts of resin and hardener, measured by volume, poured into a plastic or silicone container.
💡 TIP: To coat the board and 2 coasters, Sarah used 2 fl oz of resin mixed with 2 fl oz of hardener per layer. She did 3 coats of resin for a total of 12 fl oz.

Mix the resin and hardener together for 3 minutes. Scrape the sides and bottom of the mixing container to ensure everything is incorporated.

Pour the resin mixture into the center of each coaster and over the painted area of the board. Spread the resin evenly, using a craft stick or your gloved hand to smooth it over the sides.

Lightly torch out the bubbles.

Cover the project with a clean plastic tote or a cardboard box without flaps to protect it from dust and debris. Remove the plastic wrap approximately 2-3 hours after pouring, then allow the resin to cure for an additional 22 hours.


7. Remove the backing
Place the coasters face down on a soft towel. Use a heat gun to gently warm the contact paper and carefully peel it off. For stubborn spots, use an X-acto knife. Inspect the coasters and touch up any areas with white paint as necessary. Attach the cork backing, stamped with your logo if you wish.


Similarly, place the wood board face down on a cloth. Heat the contact paper with a heat gun and slowly cut along the resin edge to remove the backing. Work section by section, reheating as needed to navigate curves safely. Go slowly to prevent the X-acto knife from slipping and scratching the resin.


If the resin edges are sharp, carefully use a Dremel with a grinder tool attachment to sand them down, being careful not to mark the wood. Wipe away the sanding dust with a paper towel and isopropyl alcohol. The isopropyl alcohol should remove any adhesive left by the contact paper, but you can use a product like GooGone for stubborn spots.

8. Touch Ups
Sand down any areas where the tape or contact paper removed the stain. Sand with the wood grain, focusing only on the sections that need it rather than the entire board. Avoid applying too much pressure to maintain an even surface.


To restore the color after sanding, we'll need to apply a wood pre-stain and stain. The pre-stain prepares the wood for staining and helps prevent streaks. First, mix the Minwax pre-stain thoroughly using a craft stick. Wearing gloves, apply a very light coat of the pre-stain with a soft rag. Let it sit for 20-30 minutes, then wipe off the excess.

Next, apply one coat of throughly mixed Minwax wood finish, wiping off the excess as directed.
💡TIP: Note that the Minwax wood finish is not food safe until it has cured for 30 days. Always follow the label instructions for the product you're using.

After 30 days, apply food-grade cutting board oil over the entire board. Wipe off the excess oil to avoid greasiness.
And there you have it - your own DIY, food safe, marbled cheese board with matching coasters!
A big thanks to Sarah for sharing her techniques. After watching her video, we hope you feel confidently inspired to create a painted marble board and coaster set of your own.
To see more of Sarah's work:
Please visit her website: www.chromayadi.com
Follow her on Instagram: @chroma_yadi
Watch her on YouTube: @ChromaYadi
ArtResin: The Original Epoxy For Resin Art.
